Quick video but has tons of great information!
Quick video but has tons of great information!
ARE THEY FIXABLE? YES!
IS THIS WHAT EXTENSIONS DO/FEEL OR LOOK LIKE? NO
More then likely if your asking your self either of the 2 questions you’ve had a bad lash application. With a number of places offering eyelash extensions without training and a number of places that claim to offer eyelash extensions, but are really applying flares or other shortcuts instead, bad lash applications do happen everyday. Sometimes you can get them removed and have absolutely amazing lashes applied the same day, but, depending on the damage, that’s not always the best idea. If there are gaps or the lash line is especially sparse, adding extensions will only draw more attention to the emptiness – not conceal it. If the lashes have been severely damaged and broken, they need some time to heal. I have even had clients come to me hours after having bad lashes applied from a bad “lash artist” with eye so irritated and red hat all I could do was help them clean and soothe their eyes with an eyewash and send them on their way to Urgent Care to care for the infection growing.
A professionally trained lash artist that cares about their clients and industry won’t do an application if it may cause further harm to your lashes. If your lash stylist recommends some time off for your lashes to restore, please listen to them! They’re looking out for the best interest of your lash health.
To speed up recovery of damaged lashes:
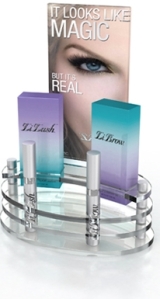
Immediately start using a good lash fortifier, like LiLash available from http://www.LiLash.com or myself if your in the San Diego Area.
 Biotin Vitamins are a great source of amino acids to help with hair growth.
Lash damage is unfortunate, but largely preventable. By doing a bit of research and selecting a trained professional for the application of your eyelash extensions, you’ll save yourself from the pain and distress of poor work.
If a lash mishap does happen to you, though, remember – it’s not the end of the world. They will ALMOST ALWAYS grow back from damage that happens just once. But, please don’t return to the scene of the lash. There are plenty of specialist out there. If cost is your main reason for going to one of these “nail shops, hair shops or swap meets” to have your lashes done just be cautious and do your research cause you may save yourself $20 or $40 now but what will it cost to fix them?
STAY EDUCATED, Lash Lovers
Don’t forget to frame your face with amazing EYEBROWS! Do them just right to make your lashes really stand out! Here are some steps for how to create eyebrows with makeup.
1. You will need :—
1 eyebrow pencil
1 highlighter pencil
3 cotton swabs
1 brow gel
2. A Clean Start :—
Start with tweezed and trimmed brows. Also, keep your eyebrow shape in mind-round, soft angled, straight, or angled land use that as a guide for drawing on your brow.
3. Filling in the Blanks :—
Since we’re not all blessed with Brooke Shields brows, we regular folk, and even some star folk, with sparse and uneven growth patterns can use some help from a brow pencil.
Although brow shadows are equally good, the pencil is a little easier to use. It’s important we don’t press hard. It’s a shadow behind the hair. Not a line so we know it’s a pencil.
When picking the right shade, choose a color as close to your natural brow. If it’s a close call, opt for the lighter shade if you’re a brunette. If you’re fair-haired, go for the darker pencil.
Starting at the head of your eyebrow, recognize the empty or sparse areas and fill in the gaps with your brow pencil.
4. The Arch :—
Gently follow your natural arch line. An easy way to see your arch, is to simply lift your brow.
5. The Tail :—
Don’t draw the tail downwards but outwards. Avoid creating tadpoles where the brow is thick at the head and has a thin tail attached. Make sure there is a gradual or minimal ascension from thick to thin.
6. Lighten Up :—
Using your highlighter pencil, gently draw a single line directly under the brow line but not into it.
Gently blend side to side with a cotton swab. Be careful not to blend into the brow.
This step will enforce the arch, the overall shape and adds an instant highlighting effect.
7. Clean it up :—
With a cotton swab, wipe the areas around your brow removing any excess brow pencil outside of your brow shape.
8. Brush it up :—
Finish by brushing up your brow hairs with brow gel. The effect, along with a good tweeze, will help lift your eye upwards.
Today I Created Something Beautiful